워드프레스
워드프레스는 오픈 소스 블로그 소프트웨어 입니다. 꼭 블로그 뿐만이 아니더라도, 쇼핑몰 같은 것도 워드프레스로 구축할 수 있을 만큼 범용성이 뛰어납니다. 저의 블로그도 워드프레스로 구성되어 있지요.
LEMP 서버
이번에는 Ubuntu server에 워드프레스 웹 서버를 구축해 보려고 합니다. 웹 서버로는 Nginx(엔진엑스)를 사용할 것이고 PHP도 설치할 것이며, 데이터베이스로 MariaDB를 사용할 것입니다. 이것을 줄여서 LEMP 서버(Linux + (E)Nginx + MariaDB + PHP)라고 부릅니다. Nginx를 ‘엔진엑스’라고 읽어서 E가 들어갑니다.
Nginx를 사용하는 이유는 Apache에 비해 서버 부하가 작습니다. 그래서 VPS를 사용하는 경우에는 높은 사양이 곧 비용이니 최대한 적은 사양으로 높은 효율을 내는 것이 중요하지요. MariaDB를 사용한 것도 MySQL에 비해 속도가 조금 빠르기 때문입니다. 또한 최신 버전의 PHP인 PHP 8.0을 사용할 것입니다.
또한, 도메인의 경우 Cloudflare DNS를 이용하기 위해서 Cloudflare에 등록할 것입니다. 그리고 보안을 위해 HTTPS 연결을 사용할 것이며, 그에 따라 인증서를 발급받기 위하여 Let’s Encrypt를 설치하겠습니다.
그럼 시작하겠습니다.
우분투 리눅스 설치하기
저는 Ubuntu Server 20.04.3 LTS 버전을 사용하겠습니다. 아래 링크에서 다운 받을 수 있습니다.
https://ubuntu.com/download/server
우분투 설치 방법은 Ubuntu Server 20.04 설치 메뉴얼을 참고하시면 되겠습니다.
앞으로 모든 명령어는 root로 로그인 되어 있는 상황이라고 가정하고 작성하였습니다. 만약 권한 부족 오류가 뜬다면 명령어 앞에 sudo를 붙여주세요.
방화벽 설정
Ubuntu 방화벽에서 22/tcp, 80/tcp, 443/tcp 포트를 열어 주어야 합니다. 그 이유는,
22/tcp – SSH 통신을 위함
80/tcp – HTTP 연결을 위함
443/tcp – HTTPS 연결을 위함이기 떄문입니다.
ufw enable
방화벽을 활성화 해 주세요.
Command may disrupt existing ssh connections. Proceed with operation (y|n)?
방화벽을 활성화 하는 과정에 위와 같은 경고문구가 나타날 수도 있습니다. 이때는 y 입력 후 엔터 눌러주세요.
ufw allow 22/tcp
ufw allow 80/tcp
ufw allow 443/tcp
80/tcp 포트와 443/tcp 포트를 열어줍니다.
서버 시간 변경하기
dpkg-reconfigure tzdata
시간대 설정으로 들어갑니다. Asia/Seoul을 찾아서 선택해주세요.
PHP 8.0 패키지 설치하기
add-apt-repository ppa:ondrej/php
저장소 목록에 PPA(Personal Package Archieve)를 추가해 줍니다. 그 이유는, 필요한 PHP 8.0 패키지가 공식 APT 저장소에 등록되어 있지 않을 수도 있기 때문입니다.
Press [ENTER] to continue or Ctrl-c to cancel adding it.
엔터를 눌러서 저장소를 추가합니다.
apt-get update && apt-get upgrade
APT 패키지 목록을 업데이트 해 줍니다.
apt install php8.0-{bcmath,bz2,cgi,cli,common,curl,dba,dev,enchant,fpm,gd,gmp,imap,interbase,intl,ldap,mbstring,mysql,odbc,opcache,pgsql,phpdbg,pspell,readline,snmp,soap,sqlite3,sybase,tidy,xml,xmlrpc,zip,xsl}필요한 PHP 8.0 패키지들을 설치해 줍니다.
패키지들 중 몇가지만 설명하자면,
- common – 기본 패키지 입니다.
- fpm – Nginx는 PHP를 해석하지 못합니다. 그래서 php-fpm이 Nginx를 위한 PHP 번역기 역할을 합니다. 따라서, php-fpm이 PHP를 해석하고, 해석한 데이터를 Nginx에게 보내는 방식으로 작동합니다.
PHP 기본설정
vi /etc/php/8.0/fpm/php.ini
php.ini 파일을 열어줍니다. (저는 vi 에디터를 사용했지만, nano 에디터를 사용하셔도 됩니다. nano 에디터를 사용하시려면 vi를 nano로 바꾸면 됩니다.)
아래와 같은 설정들을 찾아서 바꾸어 줍니다.
short_open_tag = On
max_execution_time = 3600
max_input_time = 3600
memory_limit = 256M
post_max_size = 100M
cgi.fix_pathinfo = 0
upload_max_filesize = 100M
allow_url_fopen = Off
date.timezone = Asia/Seoul
systemctl enable php8.0-fpm
php8.0-fpm이 자동으로 시작하게 설정해주고
systemctl start php8.0-fpm
서비스를 작동시킵니다.
WordPress 설치하기
cd /tmp
wget https://wordpress.org/latest.tar.gz
tar -xvzf latest.tar.gz
mv wordpress /var/www/
WordPress 최신 버전을 다운로드 한 뒤, 압축을 풀고 /var/www/wordpress로 이동시킵니다.
chmod -R 755 /var/www/wordpress/
chown -R www-data:www-data /var/www/wordpress/
/var/www/wordpress의 권한을 www-data에게 줍니다.
Certbot 설치하기
Certbot은 HTTPS 연결을 위한 인증서(Let’s Encrypt)를 만들어 주는 프로그램입니다. Certbot과 Let’s Encrypt에 관한 자세한 정보는 여기를 참고해 주세요.
apt install python3-certbot-nginx
Certbot을 설치해 줍니다.
apt install python3-certbot-dns-cloudflare
저는 Cloudflare의 DNS TXT 레코드를 이용하여 인증을 진행할 것이기 때문에, 해당 인증 과정에서 필요한 패키지를 설치하였습니다.
Cloudflare 회원가입 및 도메인 연결
제가 이전에 쓴 글인 Cloudflare 도메인 등록 및 DNS 설정을 참고해 주세요.
Cloudflare DNS 설정
Cloudflare DNS 설정으로 가주세요. 레코드 추가를 눌러서 새로운 레코드를 만듭니다.
형식은 A, 이름은 도메인 주소(저의 경우 bongtae.net), IPv4 주소에는 서버의 IP 주소를 입력해주면 됩니다. 프록시는 체크 해제하여 DNS 전용으로 선택해주세요.
또한 새로운 레코드를 만들어서 형식은 CNAME, 이름은 www, 대상은 bongtae.net으로 설정해 주시고 프록시는 체크해제해 주세요.
Let’s Encrypt 인증서 발급하기
mkdir /root/.cert
vi /root/.cert/cert.ini
인증 과정에 필요한 정보를 저장해 둘 cert.ini 파일을 만듭니다.
dns_cloudflare_email = mail@example.com
dns_cloudflare_api_key = asdlfkjasldkfasdf32f23rssdf
dns_cloudflare_email에 자신의 cloudflare 계정의 email 주소를 입력해 주세요.
dns_cloudflare_api_key에 api key를 입력해 주세요. Global API Key를 입력하면 됩니다.
chmod -R 400 /root/.cert/
보안을 위해 /root/.cert/를 읽을수만 있도록 설정해 줍니다.
certbot certonly --dns-cloudflare-credentials /root/.cert/cert.ini
Cloud DNS TXT 레코드 인증 모드로 Certbot을 실행해 줍니다.
Saving debug log to /var/log/letsencrypt/letsencrypt.log

How would you like to authenticate with the ACME CA?
- - - - - - - - - - - - - - - - - - - - - - - - - - - - - - - - - - - - - - - -
1: Obtain certificates using a DNS TXT record (if you are using Cloudflare for
DNS). (dns-cloudflare)
2: Nginx Web Server plugin (nginx)
3: Spin up a temporary webserver (standalone)
4: Place files in webroot directory (webroot)
- - - - - - - - - - - - - - - - - - - - - - - - - - - - - - - - - - - - - - - -
Select the appropriate number [1-4] then [enter] (press 'c' to cancel):
어떤 방식으로 인증을 진행할 지 묻습니다. DNS TXT 레코드를 이용할 것이므로 1 입력 후 엔터.
Plugins selected: Authenticator dns-cloudflare, Installer None
Enter email address (used for urgent renewal and security notices) (Enter 'c' to cancel):
알림용 이메일을 입력하라는 뜻입니다. 자신이 자주 사용하는 이메일을 입력해 줍니다. 그리고 엔터를 눌러주세요.
Please read the Terms of Service at
https://letsencrypt.org/documents/LE-SA-v1.2-November-15-2017.pdf. You must
agree in order to register with the ACME server at
https://acme-v02.api.letsencrypt.org/directory
- - - - - - - - - - - - - - - - - - - - - - - - - - - - - - - - - - - - - - - -
(A)gree/(C)ancel:
약관에 동의하라는 메세지입니다. A 입력 후 엔터.
Would you be willing to share your email address with the Electronic Frontier
Foundation, a founding partner of the Let's Encrypt project and the non-profit
organization that develops Certbot? We'd like to send you email about our work
encrypting the web, EFF news, campaigns, and ways to support digital freedom.
- - - - - - - - - - - - - - - - - - - - - - - - - - - - - - - - - - - - - - - -
(Y)es/(N)o:
입력한 이메일로 뉴스레터같은거 보내도 되는지 묻는 메세지입니다. N 입력 후 엔터.
Please enter in your domain name(s) (comma and/or space separated) (Enter 'c' to cancel):
인증할 도메인을 입력하라는 메세지 입니다.
bongtae.net *.bongtae.net
위와 같이 도메인을 입력해 주세요.
IMPORTANT NOTES:
 - Congratulations! Your certificate and chain have been saved at:
   /etc/letsencrypt/live/bongtae.net/fullchain.pem
   Your key file has been saved at:
   /etc/letsencrypt/live/bongtae.net/privkey.pem
   Your cert will expire on 2022-04-30. To obtain a new or tweaked
   version of this certificate in the future, simply run certbot
   again. To non-interactively renew *all* of your certificates, run
   "certbot renew"
 - Your account credentials have been saved in your Certbot
   configuration directory at /etc/letsencrypt. You should make a
   secure backup of this folder now. This configuration directory will
   also contain certificates and private keys obtained by Certbot so
   making regular backups of this folder is ideal.
 - If you like Certbot, please consider supporting our work by:

   Donating to ISRG / Let's Encrypt:   https://letsencrypt.org/donate
   Donating to EFF:                    https://eff.org/donate-le
그럼 위와 같은 메세지가 뜹니다. 해당 메세지에서 인증서가 어디에 저장 되었는 지도 확인할 수 있습니다. 인증서 저장 위치는 나중에 필요하니 메모해 주세요.
디피-헬만 키 생성하기
디피-헬만 키 교환에서 사용될 키를 생성하도록 하겠습니다.
openssl dhparam -out /etc/ssl/certs/dhparam.pem 2048
2048비트 길이의 키를 /etc/ssl/certs/dhparam.pem에 저장합니다. 시간이 좀 걸릴 수도 있으니 기다려 주세요.
Nginx 설치하기
apt-get install nginx
Nginx를 설치해 줍니다.
vi /etc/nginx/sites-available/wordpress.conf
wordpress.conf 설정파일을 만듭니다.
server {
    listen 80;
    listen [::]:80;
    root /var/www/wordpress;
    index  index.php index.html index.htm;
    server_name  bongtae.net www.bongtae.net;

    return 301 https://$host$request_uri;
}

server {
    listen 443 ssl http2;
    listen [::]:443 ssl http2;
    root /var/www/wordpress;
    index  index.php index.html index.htm;
    server_name www.bongtae.net;

    ssl_certificate /etc/letsencrypt/live/bongtae.net/fullchain.pem;
    ssl_certificate_key /etc/letsencrypt/live/bongtae.net/privkey.pem;
    ssl_trusted_certificate /etc/letsencrypt/live/bongtae.net/chain.pem;

    ssl_protocols TLSv1 TLSv1.1 TLSv1.2 TLSv1.3;
    ssl_ciphers ECDHE-ECDSA-AES128-GCM-SHA256:ECDHE-RSA-AES128-GCM-SHA256:ECDHE-ECDSA-AES256-GCM-SHA384:ECDHE-RSA-AES256-GCM-SHA384:ECDHE-ECDSA-CHACHA20-POLY1305:ECDHE-RSA-CHACHA20POLY1305:DHE-RSA-AES128-GCM-SHA256:DHE-RSA-AES256-GCM-SHA384;

    add_header Strict-Transport-Security "max-age=31536000;  includeSubDomains";

    return 301 https://bongtae.net$request_uri;
}

server {
    listen 443 ssl http2;
    listen [::]:443 ssl http2;
    root /var/www/wordpress;
    index  index.php index.html index.htm;
    server_name bongtae.net;

    ssl_certificate /etc/letsencrypt/live/bongtae.net/fullchain.pem;
    ssl_certificate_key /etc/letsencrypt/live/bongtae.net/privkey.pem;
    ssl_trusted_certificate /etc/letsencrypt/live/bongtae.net/chain.pem;

    ssl_protocols TLSv1 TLSv1.1 TLSv1.2 TLSv1.3;
    ssl_ciphers ECDHE-ECDSA-AES128-GCM-SHA256:ECDHE-RSA-AES128-GCM-SHA256:ECDHE-ECDSA-AES256-GCM-SHA384:ECDHE-RSA-AES256-GCM-SHA384:ECDHE-ECDSA-CHACHA20-POLY1305:ECDHE-RSA-CHACHA20POLY1305:DHE-RSA-AES128-GCM-SHA256:DHE-RSA-AES256-GCM-SHA384;

    ssl_prefer_server_ciphers on;
    ssl_session_cache shared:SSL:50m;
    ssl_session_timeout 1d;
    ssl_session_tickets off;

    ssl_stapling on;
    ssl_stapling_verify on;
    resolver 8.8.8.8 8.8.4.4 valid=300s;
    resolver_timeout 30s;

    ssl_dhparam /etc/ssl/certs/dhparam.pem;

    add_header Strict-Transport-Security "max-age=31536000;  includeSubDomains";
    add_header X-Frame-Options SAMEORIGIN;
    add_header X-Content-Type-Options nosniff;

    client_max_body_size 100M;

    autoindex off;
    location / {
        try_files $uri $uri/ /index.php?$args;
    }

    location ~ \.php$ {
         include snippets/fastcgi-php.conf;
         fastcgi_pass unix:/var/run/php/php8.0-fpm.sock;
         fastcgi_param SCRIPT_FILENAME $document_root$fastcgi_script_name;
         include fastcgi_params;
    }
}
각 server 블럭에서 server_name 부분의 도메인을 자신의 서버에 사용할 도메인으로 변경해 주시고, ssl_certificate 부분의 인증서와 키 위치 등을 메모해 둔 Let’s Encrypt 인증서 위치로 변경해 줍니다.
설정을 간단히 설명하면,
- 80/tcp 포트로 들어온 입력은(HTTP 연결) HTTPS로 바꾸어 줍니다.
- www.bongtae.net로 들어온 입력은 bongtae.net으로 리다이렉트 해줍니다.
결론적으로, 무조건 HTTPS연결을 이용하게 됩니다. 이것이 보안적인 측면에서도 우수합니다.
ln -s /etc/nginx/sites-available/wordpress.conf /etc/nginx/sites-enabled/
해당 설정을 활성화 해 줍니다.
rm -f /etc/nginx/sites-enabled/default
기존에 있던 default 파일은 삭제해 줍니다.
nginx -t
Nginx 설정에 문제가 없는지 확인해 줍니다.
nginx: the configuration file /etc/nginx/nginx.conf syntax is ok
nginx: configuration file /etc/nginx/nginx.conf test is successful
문제가 없으면 위와 같은 문구가 출력되어야 합니다.
systemctl enable nginx
systemctl restart nginx
Nginx를 시작시 자동으로 시작하도록 설정하고, 재시작해 줍니다.
Certbot 자동 갱신 설정하기
Let’s Encrypt를 이용하여 발급받은 인증서는 3개월짜리 이므로 주기적으로 갱신을 해 주어야 하며, 갱신할 때 마다 nginx에게 인증서가 갱신되었음을 알려주어야 합니다.
vi /etc/crontab
crontab 설정 페이지로 이동합니다.
(.....)
0 3   * * 6  root  /usr/bin/certbot renew --post-hook "systemctl restart nginx.service"
위와 같이 적힌 부분이 있을 것입니다. 앞에 숫자는 건들지 말아주시고, 아래와 같이 설정해 주세요.
0 3 * * 6 root /usr/bin/certbot renew
0 3 * * 6 root nginx -s reload
MariaDB 설치하기
apt-get install mariadb-server mariadb-client
MariaDB를 설치해 줍니다.
원래는 MariaDB에서 비밀번호를 설정해주는 과정이 필요하나, 최신 버전의 MariaDB는 그런 과정이 필요없어졌습니다. MariaDB에 로그인 할 때에는 Ubuntu 루트 비밀번호를 사용하면 됩니다.
mysql -u root -p
MariaDB에 로그인 해 줍니다.
Enter password:
Ubuntu 루트 비밀번호를 입력하면 됩니다.
CREATE DATABASE wordpressdb;
wordpressdb 라는 이름의 데이터베이스를 만듭니다.
CREATE USER 'wpuser'@'localhost' IDENTIFIED BY 'strongpassword';
wpuser 라는 사용자를 만들고, 사용자의 비밀번호를 strongpassword로 설정합니다. 비밀번호를 충분히 복잡하게 설정해 주세요.
GRANT ALL PRIVILEGES ON wordpressdb.* TO wpuser@'localhost';
wordpressdb의 모든 권한을 wpuser에게 주었습니다.
FLUSH PRIVILEGES;
변경사항을 저장합니다.
exit;
MariaDB에서 로그아웃 해 줍니다.
systemctl enable mariadb
systemctl restart mariadb
MariaDB가 시작시에 자동으로 시작하도록 설정하고, 재시작 해 줍니다.
블로그 설정하기
이제 https://블로그_도메인_주소로 접속하면 아래와 같이 블로그 설정 화면을 볼 수 있습니다.
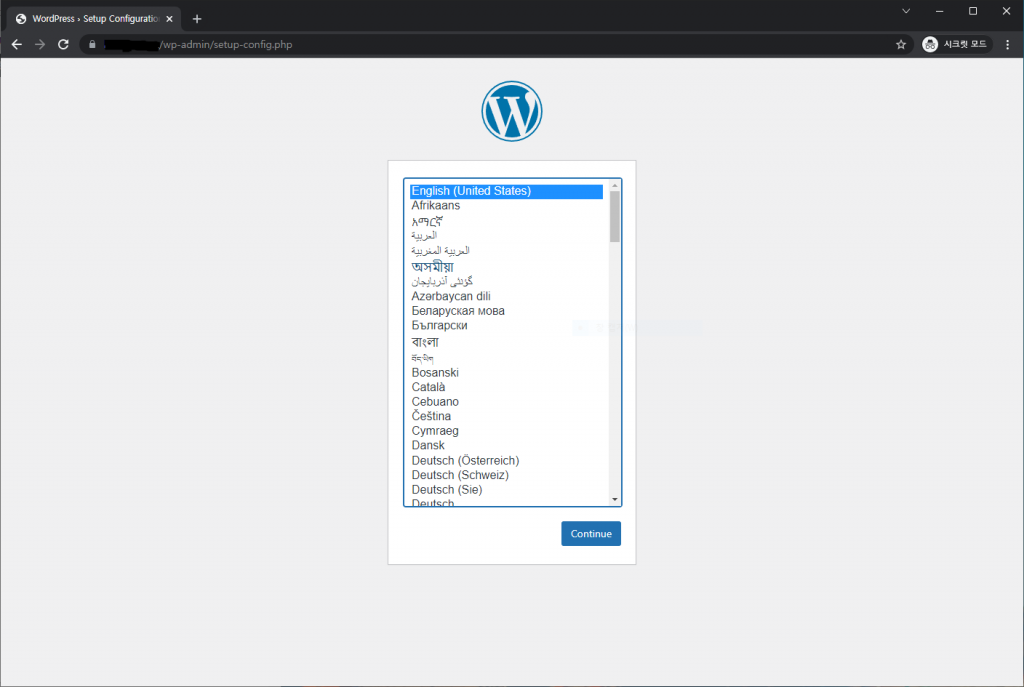
블로그 설정 과정에서 데이터베이스는 설치한 mariadb를 사용하시면 됩니다.
블로그 설정은 인터넷에 많은 자료들이 있으므로 생략하겠습니다.
읽어주셔서 감사합니다.